Discover how to fix lumpy hummus, and more importantly how to prevent it, and you’ll hold the key to creating the most deliciously creamy, smooth hummus every time.
You can make a simple & delicious hummus, right? But what if it turns out all grainy?
So here’s the deal . . .
You can be as much of a perfectionist as you want when making hummus.
In the past, I always used to put everything into the food processor and blend it, et voila. Hummus on the table, ready to go, just like in my original post on how to make homemade hummus.
But the more I read about it, the more I discover that you can perfect things, so in this post I’m going to delve into the various ways to fix a lumpy hummus or prevent it from being grainy in the first place.
Of course, you can make a rough hummus intentionally, by leaving larger lumps of chickpeas in the mix or by mashing with a fork, and that’s fine when it’s by choice.
But sometimes, you want that smooth velvet effect that you get with some of the best hummus out there. And yes, you can make it without olive oil if you’re whole foods plant based and oil free.
Oil free homemade hummus
Table of Contents
What is Hummus?
Hummus (also spelled hommos or houmous) is a middle eastern dip, basically made from chickpeas, tahini, garlic & lemon juice. Additional ingredients are olive oil, salt, pepper, cumin and some extra liquid (water or aquafaba).
Hummus is a staple part of the diet in the Middle East and can even be served hot in some countries, though in the west we associate it mostly with a delicious cold dip.
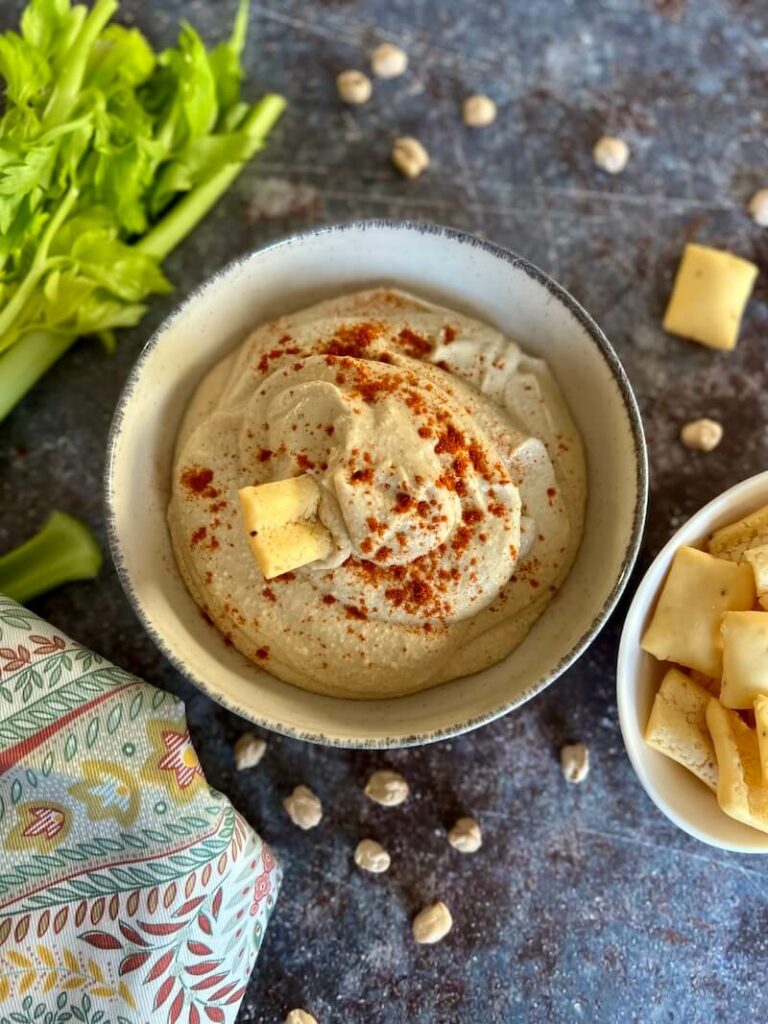
Serve hummus with raw vegetable sticks for dipping, on gluten free toast (with avocado yum), with gluten free lentil flatbreads or these easy gram flour flatbreads.
If you’ve already made a hummus that’s turned out lumpy, it could be as simple as it needing more liquid.
If that isn’t the problem and the hummus is still lumpy, blend up some tahini with aquafaba or water, lemon juice and salt, until you get a super smooth paste.
Add the lumpy hummus to the food processor along with the tahini mix and blitz it for several more minutes. You may need to add some extra water to get the right consistency (depending on how thick your lumpy hummus is).
The addition of the creamy tahini blend should be enough to bring your lumpy hummus back to the smooth consistency you love.
How to Prevent Lumpy Hummus & Make a Smooth, Creamy Hummus Instead
All of these steps are optional, and all of them help to get the smoothest creamiest hummus, the type you’ve always dreamed of.
But you don’t have to do all of them, you can choose just some of these options and still get a great smooth and creamy hummus.
The quality of the chickpeas DEFINITELY affects the final consistency and flavour.
Don’t blend the chickpeas straight from the fridge, instead warm them slightly first to get a smoother blend.
Option to cook the chickpeas in a tsp of soda bicarbonate to soften them and to dissolve the skins and get a smoother silkier blend.
If cooked in soda bicarbonate, rinse the chickpeas several times to get rid of the now dissolved skins.
You can also use soda bicarbonate after the cooking has finished by either sprinkling the soda bicarbonate over the chickpeas and heating in a frying pan, or by re-cooking for a few minutes in boiling water with a tsp of soda bicarbonate.
Otherwise, you could peel the chickpeas by hand to remove the skin after first rubbing them with a tea towel to loosen the skin and make the task easier.
The hummus can also be prepared without removing the skins. The difference is there, but both ways work out well.
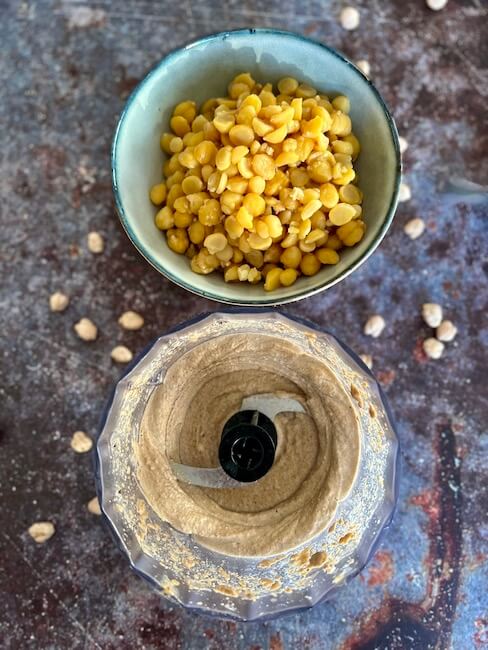
Be sure to blend all the other ingredients first and add the chickpeas to the food processor last. i.e. Blend the tahini with the garlic and some lemon juice into a smooth velvety paste first.
Use aquafaba instead of water for diluting the hummus or use ice cubes instead of water.
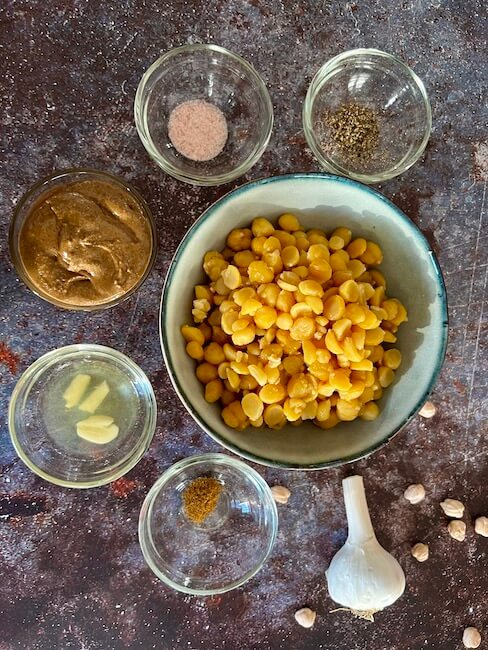
Ingredients for hummusBlend the chickpeas last
Choosing the Best Ingredient for a Smooth Hummus
Obviously the ingredients in anything can affect the outcome of a recipe, but in the case of hummus, I think you’ll be surprised by some of them!
Let’s take a look . . .
Chickpeas
You can use dried chickpeas or the ready cooked chickpeas which come in a jar.
Please note, people also use tinned chickpeas – I haven’t the tinned chickpeas which you get in Holland for example, because the only time when I tried them they were very small and dry, nothing like our Spanish chickpeas at all. Here, our ready cooked chickpeas come in a jar.
Whatever type of chickpea you go for, the quality will have a huge influence on the flavour.
Pre-Cooked Chickpeas
Chickpeas from a jar have the benefit of being so convenient, but the hummus result varies ENORMOUSLY depending on which chickpeas you buy. You really can get grainy dry flavourless (comparatively) chickpeas or lush creamy juicy and flavoursome ones.
And this shines through in the final result.
I’ve even bought chickpeas which I’ve then refused to make more hummus from (kept them for an emergency, to add in a curry or so), because the result was so lifeless.
But don’t worry, if you have some poor quality chickpeas at home, of course you can use them. Just bear in mind that the flavour can be MUCH better with better chickpeas.
There’s no such thing as a non-salvageable hummus. At its worst, hummus is still OK.
Cooking your Own Chickpeas
If you have the time, this would be my preferred choice because you really can get an extra depth to the flavour. One thing which used to stop me from cooking my own chickpeas was the thought of all that soaking.
But the truth is, if you use a rice cooker, you can cook chickpeas sooo simply.
It’s still best to soak them overnight if possible, then put them in the rice cooker using 1 cup more water measurements than you would for rice, and turn it on. If you can’t soak them, you’ll need to allow a much longer time for time for cooking.
Either way, chickpeas take longer than rice to cook so for best results cook them well in advance.
You’ll have to keep a check on it to check that the water level doesn’t drop too low before the chickpeas are soft. Be prepared to turn it off manually when the chickpeas are soft or to add more water if necessary.
Is it Worth Removing the Peel from the Chickpeas for Making Hummus?
Chickpeas have a translucent skin on them which doesn’t actually add to the flavour. Those skins can make your hummus lumpy.
But is it worth removing them? Well, as with everything, it depends. If you’re after a really smooth hummus then yes, definitely you can go ahead and get those little pesky things off the chickpea and see what a beautiful creamy hummus you make.
But on the other hand, you can get a pretty smooth hummus without removing the skins, just maybe not quite as smooth.
Or maybe you have a super-duper top of the range blender and you don’t feel that it’s necessary to input that extra time de-hulling chickpeas.
So as you can see, there are different ways to view to this story.
As with everything in the world of hummus, it comes down to what you prefer and maybe just plain simple down to the mood you find yourself in.
Sometimes I fancy a luscious creamy chickpea without the skins and at other times I really couldn’t care less and want the easiest, quickest option available to me.
So you see, it’s all in your hands. But what if you DO want to peel the chickpeas?
How to Peel Chickpeas
Here are a few options for how to peel your chickpeas.
There are various methods for peeling chickpeas and at the time of writing I haven’t tried all of them.
How to Use Soda Bicarbonate to Soften Chickpeas & Remove Hull
One way to remove the hull from the chickpea is to add 1 1/2 teaspoon soda bicarbonate to the soaking water prior to cooking, or to the actual cooking water.
One thing though, if you add too much, your chickpeas will turn stinky. They still taste fine, but the soda bicarbonate creates an unpleasant smell (IMO).
This method of cooking with soda bicarbonate will soften the chickpea skins so that they break up and disintegrate easily and the chickpea is softer too, so you get a win-win if your goal is a creamy hummus.
Once the skins have all disintegrated and are floating in the water, you have to rinse until you’ve successfully got rid of all the little bits floating in the water. This can take quite a lot of rinses.
If your chickpeas are pre-cooked, you can re-heat them with some soda bicarbonate, either in a frying pan or in a pan of water just for a few minutes.
Once they’ve been (re) ‘cooked’ in the soda bicarbonate, follow that same rinse method as above – rinsing them in water several times and rubbing them between your hands to remove the skins.
How to Peel Chickpeas Without Soda Bicarbonate
If you don’t have any soda bicarbonate handy, you can also pick off each individual skin from pre-cooked chickpeas, chickpea-by-chickpea, but that sounds a bit tedious to me.
Rub the chickpeas using a tea towel first so that the skin has loosened, then pop each chickpea out of its skin.
Another option is to put the cooked chickpeas in cold water rub them between your hands, settling for removing some of the hulls, the ones which come off easily and float at the top.
You may not get all of them, but you also won’t have to hand-pick each hull.
Tahini
Of course you can make hummus without tahini if you haven’t got any, but it won’t be the same. So if you’ve run out, go ahead and make a yummy hummus, but if you have the choice of adding it, I say, bring on the tahini!
Different quality and brands of tahini have varying flavours, so this is an ingredient which can really affect your final hummus flavour.
Light or Dark Tahini for Hummus?
Dark tahini is made from sesame seeds which have the hull left on. It has a stronger flavour than the light tahini which is made from sesame seeds with the hull removed.
Dark tahini can tend towards bitter if you get a less tasty brand (IMO) but if you get a great one, you can use less tahini than a blond tahini for the same effects.
It’s always going to be a matter of preference, but the pale tahini is a safer bet because of its sweet mildness.
Having said that, I now buy dark tahini because it seems more whole to me and I’ve had some which I love just as much as the light version (and others which weren’t so special).
How Much Tahini to Add to Hummus?
Most recipes suggest adding 1-2 tablespoons of hummus but this is seriously an ingredient you can play with. If you love it, add more to get an extra depth of tahini flavour in the hummus dip.
Some recipes call for up to 8 tablespoons, so you can really be more or less generous. I normally add 2-3 tablespoons and I find that perfect.
Garlic for Making Hummus
For me, if you forget the garlic, you’ll miss the flavour of hummus. Hummus needs garlic! But on the other hand, if you put too much garlic in it, I find it one of the worst mistakes out there.
Too much garlic might make the (unpleasant) flavour repeat on you for the rest of day and it might also give you a horribly dry mouth, as well as creating a completely disgusting ‘memory’ of hummus.
So I normally add 1 small clove of garlic to hummus, but there are other steps you can take to make sure that garlic doesn’t spoil your hummus.
How to Remove the Strength from Garlic
There are two things you can do to avoid the problem of the garlic being too pungent, or repeating on you, or giving you terrible garlic breath.
One is to remove the little centre bit from the garlic clove and discard it. So cut the clove in half and use a knife to tweak out the inner stem.
The other tip is to soak crushed garlic in lemon juice for 10 minutes before you go on with the recipe, which will weaken the bite from the garlic and give it a milder flavour.
Lemon Juice for Making Hummus
Lemon juice is essential for a delicious homemade hummus. How much you use will depend on the exact lemon you have and the exact hummus you’ve made. So I would make the initial hummus recipe with the juice from 1/2 a lemon and then do the taste test, adding more as necessary.
I always choose a fresh lemon. I don’t think the stuff that’s preprepared taste the same.
Aquafaba or Water for Making Hummus
You’ll need to add a liquid when you’re making the hummus so that it isn’t too thick. You can choose between aquafaba or water.
Aquafaba is the cooking liquid that comes from cooking the chickpeas and it adds a little extra something to the recipe.
But to be honest, I usuallly use water and I haven’t noticed a big difference between the two.
So, if you don’t have any aquafaba, you can go ahead and use water, no problem.
Apparently, using ice cubes instead of water will render a smoother hummus. I haven’t tried this yet, but I will do and will report back with my findings when I have a conclusion!
Salt, Pepper and Cumin in Hummus
Hummus tastes better with just the right amount of salt, a good grinding of black pepper and a pinch of cumin. But these can all be added to taste.
How to Make a Smooth Hummus (& Prevent Lumpy Hummus)
Silky Smooth Classic Hummus
Serving Size:
4-6
Time:
15 mins
Difficulty:
Easy
Ingredients
250g chickpeas, cooked and peeled
2-3 tablespoons quality tahini
1 clove garlic with the centre removed
juice from 1 lemon
salt
black pepper
pinch of cumin
Directions
Squeeze the lemon juice of half the lemon into a dish. Cut the garlic clove in half and remove the thin stem in the middle of the close. Next squash the clove with the flat side of the knife and put it into the lemon juice for 10 minutes.
Place 2-3 tablespoons of tahini into the food processor. Add the juice from the half lemon & garlic, a little salt, pepper and cumin and blend into a smooth paste with extra water. Add just a little water to begin with, and keep adding more as necessary.
Next, pour the chickpeas into the food processor and blend for several minutes. Add yet more water at this point. Note: if the chickpeas come from the fridge, warm them slightly just to take off the chill before blending in order to get a smoother blend.
Taste the hummus and add more lemon juice, salt, pepper and cumin to taste.
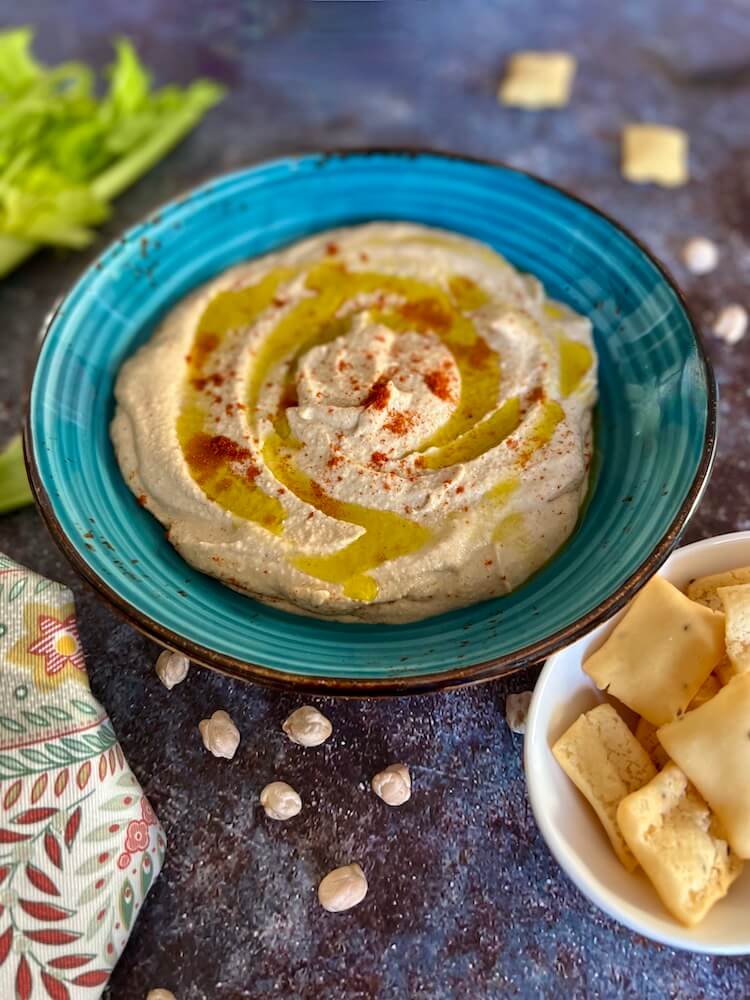
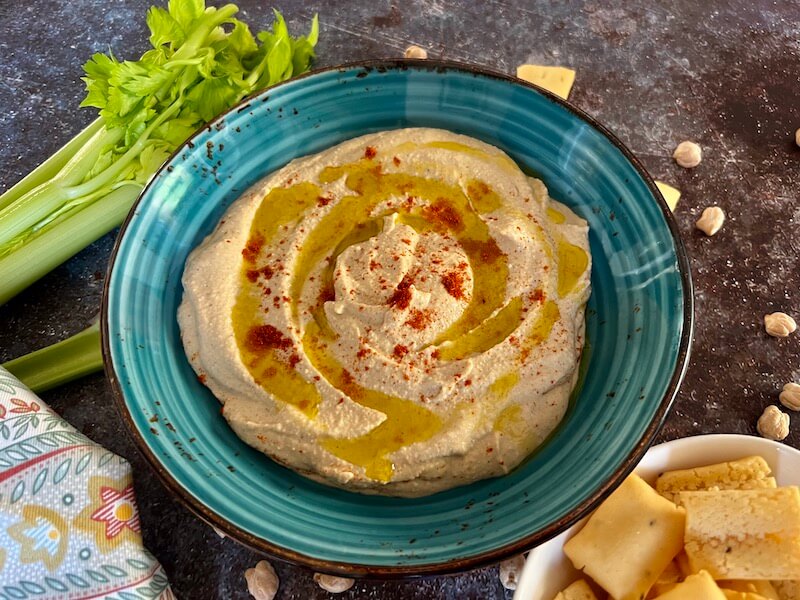
Serve oil free, or a drizzle of good quality extra virgin olive oil on top.
11 Secrets to Making the Best Hummus Ever
Use creamy chickpeas in the first place (poor quality chickpeas can be grainy and dry)
Choose the tastiest tahini – light tahini for a milder taste and dark tahini for more bite.
Remove the centre ‘stalk’ from within the garlic clove before you start.
Smash the garlic and let it sit in the juice from half a lemon for 10 minutes. You will add more lemon juice at the end of the preparation.
Blend the tahini, lemon juice, crushed garlic, salt, pepper and cumin together with some water or aquafaba until you get a smooth creamy paste. Gradually add more liquid as necessary.
If your chickpeas are coming from the fridge, warm them up before adding them to the food processor and blending them with the tahini paste.
You can use ice cubes or cold water for adding to the final hummus blend but it isn’t essential and you can get a great smooth consistency and delicious flavour by using normal temperature water.
The MOST important step: taste the hummus to create the final flavour! At this point you will add more lemon juice to taste and salt to taste. This is the step that takes your hummus from ok to spectacular.
Put the hummus into the fridge for at least an hour before serving.
Leave the hummus oil-free and then, if you’re not living an oil-free lifestyle, drizzle a tasty pure virgin olive oil on top just before serving.
Don’t think of hummus just as a dip – serve it also with vegetables, on jacket potato, with a salad, on a vegan pizza, in a buddha bowl, on toast, in a sandwich or pitta bread, as a salad dressing ingredient, and on the side of so many other dishes.
I hope you fall in love with homemade hummus after putting these tips into action!


 Easily")
